Create A Mac Recovery Partition: Join With Us for Instant Support
Since the launch of Lion in Mac OS X there is no need to create a Mac recovery partition in your device. As this gadget now comes with an inbuilt recovery partition which is generated automatically for the user during installation and stored in a hidden division of the hard drive. It helps you in recovering a failed Mac, by pressing Cmd and ‘R’ key together during the process of startup, doing so will take you directly to the recovery mode. However, in many cases due to some reason, the partition is not created during the installation process. In these cases, a user can create his own Mac recovery partition. With the help of this article, you will get to know about the post that will help you will get to know how can you create it on your own.
If you can make use of a free tool if you own Mac OS X Mavericks or earlier versions that are listed in the below in the article, but this will not be compatible with Yosemite and later versions of macOS. At times, Mac recovery partition won’t help, like the hard drive where the recovery partition stored fails catastrophically. Under this circumstances, you need a recovery disk stored on a storage medium that is removable.
To create a Mac recovery option, you need to perform the below process:
The best and the simple way is to reinstall the macOS completely. It is a fine and the best solution to create a recovery partition. Although, it is a time-consuming approach, highly effective. To get it done you need an 8GB or larger removable drive which doesn’t have any other data stored on it.
- First of all, you need to back up your Mac device so that you may not lose any valuable file.
- After backing up your data, download the installer file for High Sierra and save it on your removable drive that can store data up to 8 G.B of data inside it.
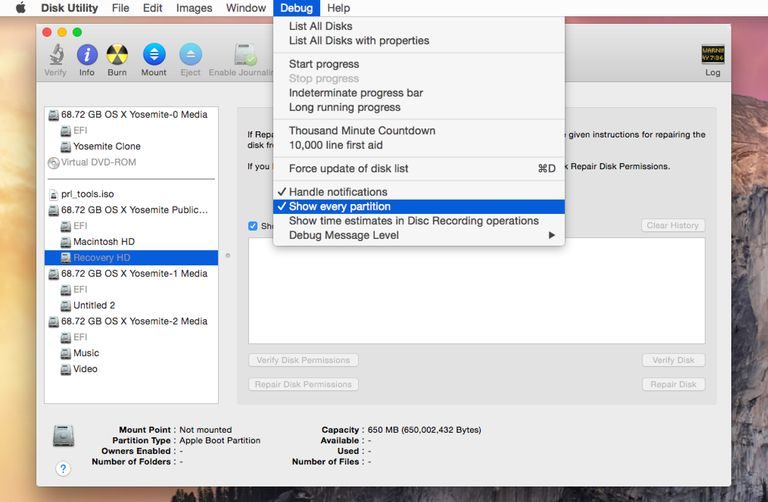
- Now, drive that you use must be format as a Mac OS Extended volume with a GUID Partition Table. To do so, go to Applications, click on “Utilities and open Disk Utility.” Select the drive and then choose the “Erase” option.
- In the next step, you need to download the High Sierra from the store of Mac applications. As you are using OS X 10.13, you will get a warning message: ‘Would you like to continue?’ Click on the option of “Yes” and log in with your Apple ID and password. The downloading can take a bit longer as the installer is about 5GB in size.
- After downloading, the installer will launch automatically but as we don’t want to use it yet press Cmd and “Q” Key to quit. You need to search the installer file that appeared in the folder of applications and then save it to an external flash drive.
- In the next step, you need to create a bootable USB disk so that the newly downloaded High Sierra can be install. You can also perform it by creating a bootable drive using Terminal. For this, you need to connect the removable drive with your device to ensure that it is called Untitled, rename it only if necessary. Ensure that the High Sierra installer is in its default location in your main Applications folder.
You need to select the apply the below mentioned terminal commands and copy it (Cmd + C)
sudo /Applications/Install\ macOS\ High\ Sierra.app/Contents/Resources/createinstallmedia –volume /Volumes/Untitled –applicationpath /Applications/Install\ macOS\ High\ Sierra.app –nointeraction
- Now, you need to go to the Application and double click on “Utilities” to launch it.
- Paste the copied command into Terminal and then click on “Return.” Type account ID and password and then press “Return.”
- If in case, you see a message “To continue we need to erase the disk at /Volumes/Untitled. If you wish to continue type (Y) and press return.” Yo need to do the same. The procedure can take from a couple of minutes to half an hour for getting complete.
- Now you can install a fresh copy of High Sierra from the installer drive.
- You need to restart the Mac while holding down the Alt key along with boot drivers connected. It will take you to Startup Manager. Select install macOS High Sierra from the drive. Select ‘Disk Utility’ and your hard drive, then select Erase. Now go back to the option of the main menu and click on Install OS X.
- After installing the High Sierra, you can restore apps.
- Now settings from a Time Machine backup, or can manually download them again.
The steps mentioned above can be applicable on latest versions on macOS. If you are using Mavericks and earlier versions you can make use of a tool called Recovery Partition Creator. Follow the below steps,
It is recommended to backup the data because the Mac recovery partition tool alters the hard drive that can result in some data loss. Therefore, is advisable to recover your data before you begin the process.
- In the next step, you need to make a copy of the installer file Open the Mac App Store, look for the relevant version of OS X, and click download. The install file should arrive in the folder of your application.
- OS X may deny opening the application because of security settings. If you want to continue, go to “System Preferences” click on “Security & Privacy” and set it either to ‘Allow apps downloaded from’ to ‘Anywhere’ (not recommended) or click ‘Open Anyway’ next to the warning message.
- Now, in the next step, you need to Set the app to work. You can do it by clicking on “Open” at the conclusion of the last step. An alert will appear on your screen that “the program you are about to run will modify your hard drive… We recommend that you backup all of your data”. Click ‘Ok’ to proceed.
- Now, follow the instructions that appear on the screen. You need to choose a drive to save the recovering files. Agree for disk checking and locate the install file.
It is all you need to do the create a Mac recovery partition, but in case you are unable to do so call us at our service helpline number 045490506. We can help you in creating Mac recovery partition at minimum rate and time.


